"Let's Build an Arduino!" says my electronics teacher, Tim. Initially I thought he meant we're building something USING Arduino, but he really meant it- we were BUILDING Arduino. I guess this is the process of understanding what Arduino is, the hard way ;)
First, we plugged in Atmega328- Arduino bootloader-programmed chip on our breadboard.

Then the resonator

Added wire for the power.
 Connected the resonator.

Inserted resistor

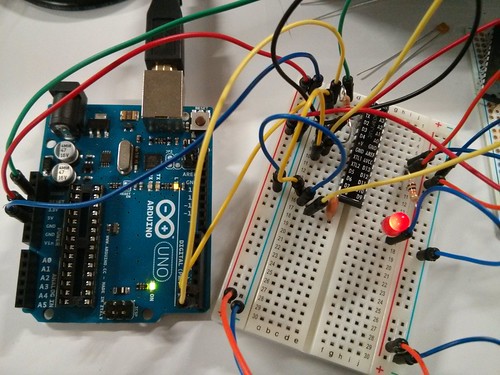
Inserted LED

"OK, let's test. Remove the chip from your Arduino board, and connect this."
My initial reaction was: EXCUUUUUSE ME? What do you mean remove the chip from my Arduino board???? But that's what we did. Pulled out the chip from Arduino board. I thought I might break it, but OMG it works!

LED blinking, and the chip on Arduino board is not there, so the cabley things on my breadboard actually works!
OK... next we are doing the same thing on a proto board, so that we can build something semi-permanent. This time, we need to do soldering.
First, we soldered the resistors.

Then we soldered the wires.

Socket for IC.

Then the LED.
 Soldered resonator.
 Lastly, serial wires.

Front... I need to practice getting the right length...

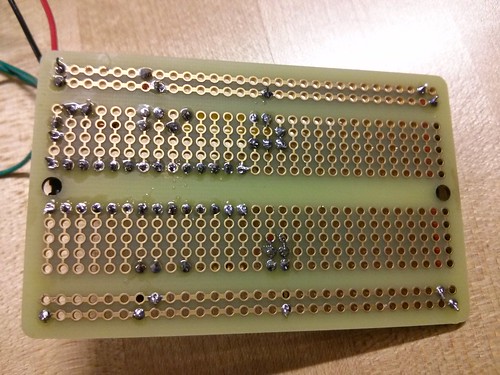
Back... I need to practice soldering more... But it works!!
Thanks to Tim Hatch for teaching me!!
Disclaimer: The opinions expressed here are my own, and do not reflect those of my employer. -Fumi Yamazaki
First, we plugged in Atmega328- Arduino bootloader-programmed chip on our breadboard.

Then the resonator

Added wire for the power.


Inserted resistor

Inserted LED

"OK, let's test. Remove the chip from your Arduino board, and connect this."
My initial reaction was: EXCUUUUUSE ME? What do you mean remove the chip from my Arduino board???? But that's what we did. Pulled out the chip from Arduino board. I thought I might break it, but OMG it works!

LED blinking, and the chip on Arduino board is not there, so the cabley things on my breadboard actually works!
OK... next we are doing the same thing on a proto board, so that we can build something semi-permanent. This time, we need to do soldering.
First, we soldered the resistors.

Then we soldered the wires.

Socket for IC.

Then the LED.


Front... I need to practice getting the right length...
Back... I need to practice soldering more... But it works!!
Thanks to Tim Hatch for teaching me!!
Disclaimer: The opinions expressed here are my own, and do not reflect those of my employer. -Fumi Yamazaki
0 件のコメント:
コメントを投稿